
What is Elementor?
Elementor is one of the fastest growing page builder plugins available for WordPress. Like other page builders, it provides website editors the ability to create complex pages using a simple, intuitive interface.
Editing Your Page Using Elementor
Signing In
- Sign into the back-end of your site (if you don’t know the url to log in, please e-mail dsaweb@colostate.edu). Use your NetID to sign in (in the format NetIDName@colostate.edu and then your NetID password (formerly known as your eID). If you signed in successfully, you will see a thin black bar at the top of the site.
- Next navigate to the page you wish to edit.
- Once on the page, click “Edit with Elementor” at the top of the page (within the thin black bar)
- Finally, the Elementor Page Builder will open so that you can edit your page.
Elementor Basics
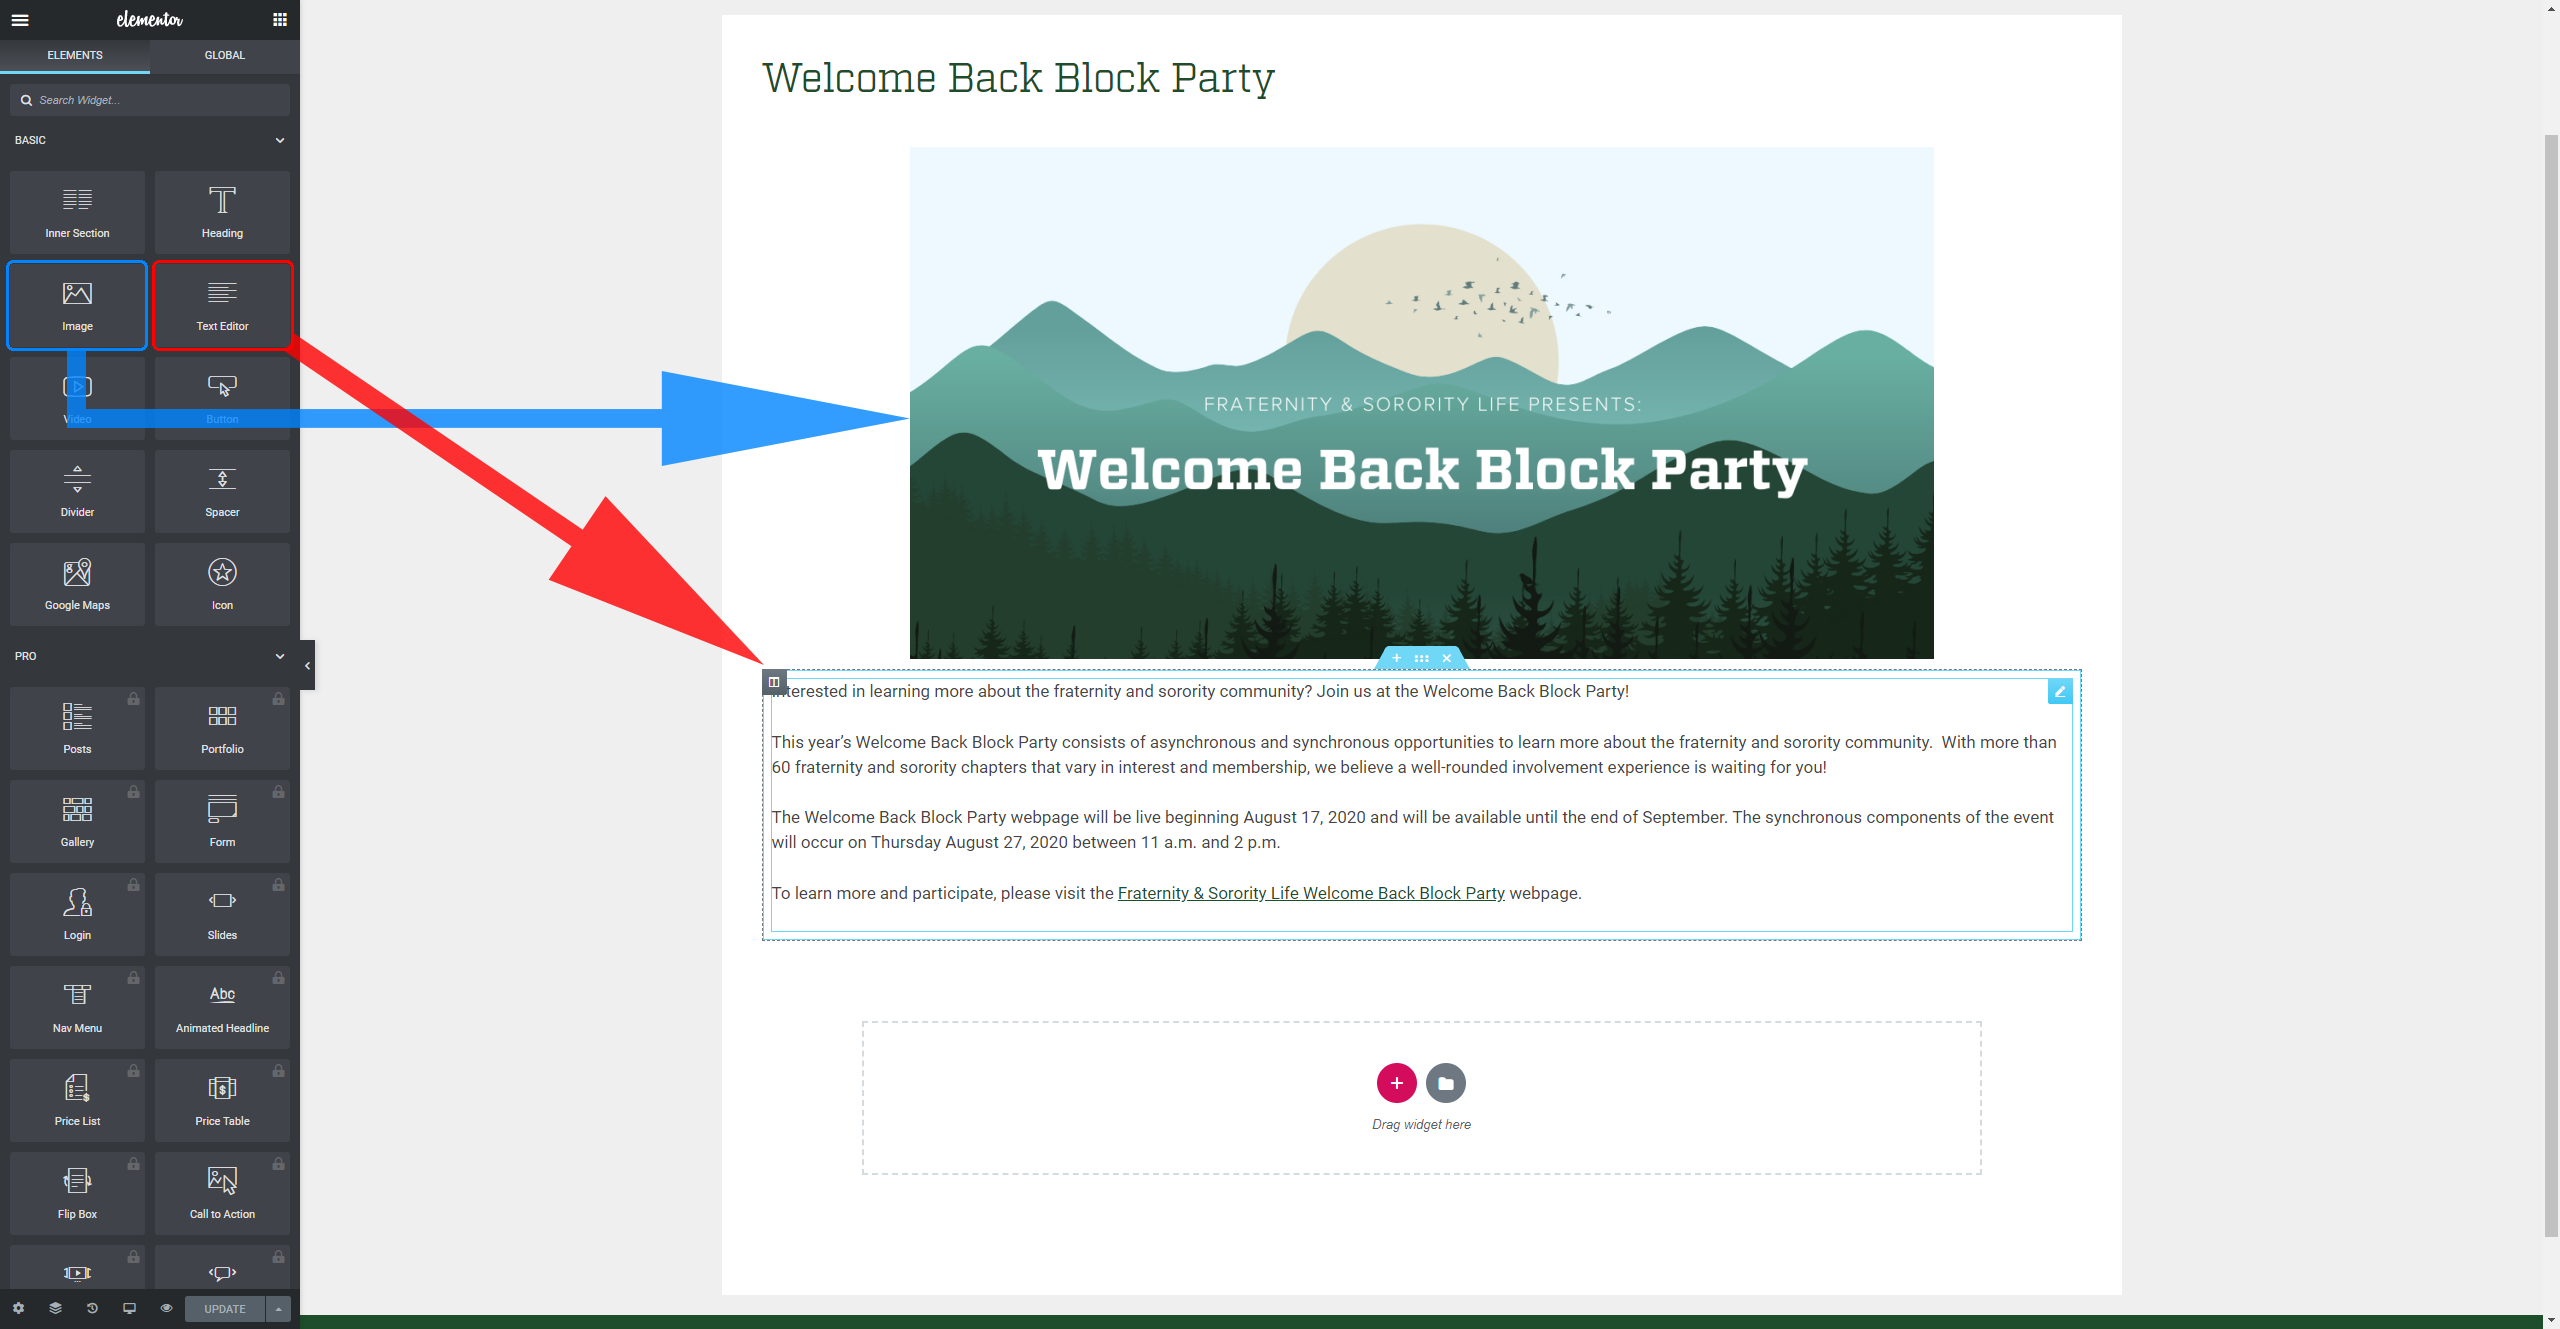
Inserting Widgets
The core concept of Elementor, like many other page builders, are blocks (or as Elementor calls them, “widgets”). There are widgets for text, images, icons, buttons, and more. To add any of those elements onto your page, you simply drag the respective widget onto the page.
Widget Controls
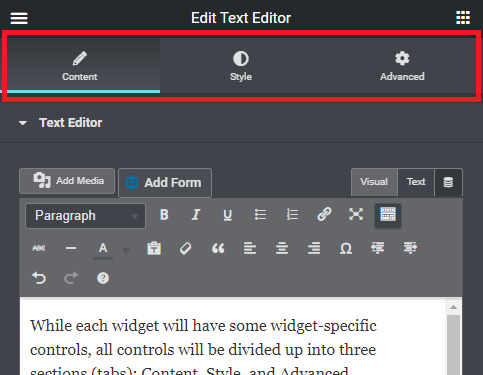
While each widget will have some widget-specific controls, all controls will be divided up into three sections (tabs): Content, Style, and Advanced.
The vast majority of your time editing will be spent in the “Content” section. This is where the core settings of any widget resides. For a button, it is where you will set the button text and the button’s link. For an image, it is where you will set what image to display. And so on.
When/if you want to tweak minor things about the widget, you’ll look under the “Style” section. You’ll find color options other style-related settings. You probably won’t spend much time in this tab but it’s good to know it exists for the times you need to change some of the smaller aspects of a widget.
Lastly, there is the “Advanced” tab. You will almost never need to change settings in this section. If you’re having to, or wanting to, change these settings, it’s probably a good idea to contact us at dsaweb@colostate.edu.
Advanced Widgets
As you spend more time using Elementor, you’ll eventually find yourself needing more complex widgets than the usual text, image, button, etc elements. Some examples of more complex widgets are forms, charts, slideshows, and accordions. While not all of these widgets are pre-packaged with Elementor (see: plugins), they are [almost always] compatible meaning you can use them like any other widget.
Elementor Training Video Provided to Orientation and Transition Programs, 10/9/2023
Design/Accessibility Considerations
While Elementor is a very powerful tool, and can build about anything you can possibly imagine, it’s important to ensure that whatever you create is in keeping with CSU’s brand and accessibility standards:
Design
Accessibility
Web accessibility compliance became law in the United States with the enactment of the Americans with Disabilities Act (ADA) in 1990. But as individuals quickly adopted the internet in the mid-1990s, the inaccessibility of many digital areas became a growing problem for the disability community. And it was unclear what, if any, portions of the ADA protected the rights of people with disabilities online. In response to this confusion, the U.S. Department of Justice (DOJ) clarified in 1996 that websites could be considered “public accommodations” under Title III of the ADA—meaning website owners have a legal obligation to ensure these digital properties are accessible.
CSU Guidelines
Elementor-Specific Training
- Video – Make Your Elementor Website Accessible
- Elementor Help Center – Make your website accessible
- How to Make Your Website Accessible With Elementor
Scanning Tools
Accessibility Top Tips
1. Use Descriptive and Unique Page Titles
- Ensure every page has a meaningful title to help users with screen readers understand its purpose.
2. Add Alt Text for Images
- Provide descriptive alt text for all images, including logos and decorative elements (use empty alt attributes for purely decorative images).
3. Structure Content with Headings
- Use proper heading hierarchy (H1 for the main title, followed by H2, H3, etc.) to organize content clearly.
4. Ensure Link Text is Descriptive
- Avoid vague link text like “Click here.” Instead, use descriptive phrases like “Learn more about accessibility.”
5. Use Accessible Color Contrast
- Verify that text has sufficient contrast against its background using tools like WebAIM’s Contrast Checker.
6. Provide Keyboard Navigation
- Check that all interactive elements (buttons, forms, links) can be navigated and activated using a keyboard alone (e.g., the tab and enter keys).
7. Use Accessible Forms
- Ensure all form fields have labels, proper focus states, and error messages. Use Elementor’s form widgets with built-in accessibility options.
8. Avoid Automatic Animations
- Minimize auto-play animations or slideshows. Provide controls for users to pause, stop, or adjust playback speed if they are necessary.
9. Test with Accessibility Tools
- Regularly test pages with tools like WAVE, Axe, or Lighthouse to identify and resolve accessibility issues.