What is Gravity Forms?
Gravity Forms is an extremely powerful and flexible WordPress plugin that can be used in place of nearly any traditional, paper-based form. If you or your office want to convert any existing paper-based forms to an online form, Gravity Forms is the perfect solution.
Building & Configuring a Form
Adding Fields/Questions
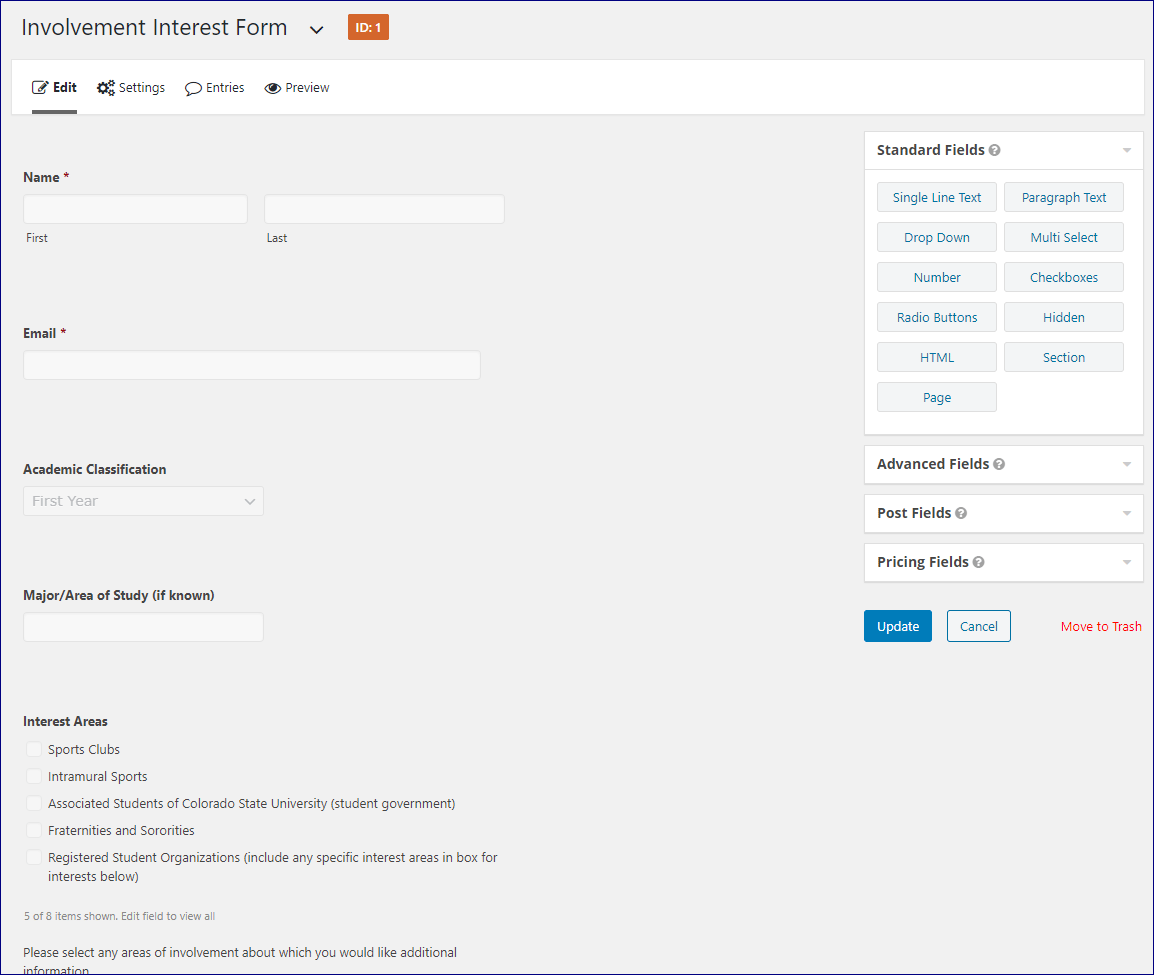
If you have experience with a WordPress page builder (see: Elementor and WPBakery Page Builder), building out a Gravity Form should feel pretty familiar. Whereas you insert elements/widgets into page builders, in Gravity Forms, you simply add different “fields” into your form.
From simple fields such as single-line textboxes and drop downs to complex fields such as addresses and file uploads, Gravity Forms has all of that built-in. Once you’ve dragged a field into the form, simply give it a name, description, and/or mark it as required. Once done, just be sure to press Save!
Configuring Confirmations
For the best user experience, it’s best to customize the message that gets displayed to the user after they submit your form. Form a simple “Contact Us” form, the default message of “Thanks for contacting us! We will get in touch with you shortly.” could do just fine. However, for any other use case, it’s best to customize it to your specific case.
These settings can be found under “Settings > Confirmations” of your form.
Configuring Notifications
Notifications differ from confirmations as they can send a message to anyone (including the person who submitted the form) immediately when the form is submitted. You can also have multiple notifications configured.
For an RSVP-related form, you would most likely want more than notifications in place: one for the event admin and one for the submitter with more information about the event. You can customize what the email says for each notification you add.
Adding a Gravity Form to a Webpage
Once you have added all the fields to your form, setup the confirmations, and setup the notifications, you’re finally ready to add the form to a page where website visitors can use it! The excact process differs from page builder to page builder but, regardless of which one you’re using, there will be a “Gravity Forms” element/widget that you can add to the page.
After you’ve dragged it onto your page, just be sure to select which form you want to display. Remember: any edits you wish to make to the form will occur back within the Gravity Forms editor and not this page you just added the form to.
Viewing & Exporting Form Submissions
While you might have your form’s notifications configured so that your email gets the information of every submission made to the form, it’s often useful to view all submissions in one place. This is where the “Entries” page (located at Forms > [Desired Form] > Entries) of your Gravity Forms comes in handy.
If you ever need to export form submission data, that is also provided within Gravity Forms. Simply go to the “Import/Export” page of Gravity Forms and choose the form you’d like to have exported. The exported file will be a .csv so it can be open with any spreadsheet application.
Diving Deeper into Gravity Forms
Part of what makes Gravity Forms so popular is that its default functionality is extremely easy to use but that there are also useful features hidden a bit deeper. Want to have a second question appear only if the user answers “Yes” on a previous question? There’s a way to do that. Want to have the form be broken into multiple sections or pages? There’s a way to do that. So feel free to take a deeper dive into Gravity Forms!